|
* TinkerDifferent *
Retro Computing Community |
| Home | Forums | What's New | Search | Settings |
| iMac (Late-2009) Graphics Card Bake Success Story |
Forums > Vintage Apple > Macintosh > Intel-based Macs
|
wottle Active Tinkerer Fort Mill, SC -------- Joined: Oct 30, 2021 Posts: 841 Likes: 577 |
Nov 1, 2021 - #1
Figured I would kick off this sub-forum by relaying my success story with resurrecting a late-2009 27" iMac I was given that would boot but displayed nothing on the screen. I found a video from @JDW about the absolutely absurd idea you could possibly fix it by backing the graphics card in the oven. I had followed his video on recapping my SE analog board, so while the idea seemed crazy, I figured I had nothing to lose. Baked that thing for 10 minutes, applied new thermal paste (a little too much, but it seems like it's doing the trick), reinstalled, and booted up with a nice, bright screen.
I've only run it for a few days since the bake, but since this isn't going to be a daily driver, I'm hoping it will last a while. Anyway, wanted to thank @JDW for another fantastic video! Liked by KingDingus,fehervariaandJDW |
|
stealer0517 New Tinkerer -------- Joined: Oct 28, 2021 Posts: 4 Likes: 2 |
Nov 2, 2021 - #2
My co worker has a 2010 iMac that also has a dead GPU.
We opted to get the slightly higher end 5670 along with pimping out the rest of the system. But I should give baking the old GPU a shot. At the very worst I could potentially upgrade my 2007 iMac with this old GPU. Liked by wottle |
|
wottle Active Tinkerer Fort Mill, SC -------- Joined: Oct 30, 2021 Posts: 841 Likes: 577 |
Nov 2, 2021 - #3
Yeah, replacement was my backup plan if the baking didn't work. We'll see how long it lasts, but I'm hoping the longer bake (10 minutes) along with the higher quality thermal paste, and running the fans at a bit higher rate will make it last through casual usage.
I'm trying to be smarter about my vintage Mac collecting by obtaining Macs when they hit their bottom, value wise, so picking this up for free and getting it working means I have a thick edge aluminum iMac. Now I just need a white iMac g5 / Intel white iMac to complete the series (up to m1, at least). Liked by RetroViator |
|
nottomhanks Tinkerer -------- Joined: Oct 31, 2021 Posts: 148 Likes: 85 |
Nov 3, 2021 - #4
I've done this several times. Picking up a 2009 27" this afternoon. The good news is that the 2009s use the 4xxx GPU, which actually works great with the DosDude Mojave patcher. Throw an SSD in there and max out the ram and it's actually quite usable today. Especially if you have the i5 or i7 processor!!
|
|
Certificate of Excellence Active Tinkerer United Sates -------- Joined: Nov 1, 2021 Posts: 765 Likes: 530 |
Nov 3, 2021 - #5
I did this with a GPU in my 2006 white 24 inch imac and it did initially work. I got about another 10 months out of it until it went kaput for good at which point I swapped out the GPU. My buddy did another 24 inch imac and it is still working to this day. I think the difference between the two was he bakes at400F where at the time I baked mine at 325F. 60/40 solders melt at 370F so my hypothesis is that he got full reflow where I did not hence the temporary fix. When I tried a second time, the bake did not fix it, so the exposure to heat in the oven while works to reflow a pcb, could very well be damaging to the componentry on it. It is my limited, anecdotal experience that when a populated board is baked to reflow it, I've only gotten on try, so best to get temps & time duration right the first time :D
One thing I do is I keep a small toaster oven in my garage for hot tasks and do not use my kitchen food preparation oven. While I've never heard or read about this act poisoning anyone with cross contamination of heavy metal residues or noxious chemicals coating the oven, I figured $15 bucks at my local thrift was cheap insurance to ensure a safe food preparation environment for myself and my family. Just make the toaster oven goes up to 400F which most do or should. You'll also get faster heat up and cool down times and a more efficient use of electricity than heating up a big full 16-20# turkey sized oven for a 4x6" PCB. Liked by wottle |
|
wottle Active Tinkerer Fort Mill, SC -------- Joined: Oct 30, 2021 Posts: 841 Likes: 577 |
Nov 4, 2021 - #6
Yeah, I used a separate thermometer to test and feel pretty certain that I was between 395-400 degrees. I may scout out a toaster oven for this, as it's probably safer and more efficient. And using a independent thermometer would allow me to verify the temperature, so no need to worry if the built in thermostat is off. I'm going to be on the lookout for other damaged machines to harvest for parts, since the machine I have is basically brand new condition and I expect things will die on it at some point.
I didn't realize the earlier models had similar issues, but it's good to know the bake may allow for them to be fixed as well. Liked by Certificate of Excellence |
|
wottle Active Tinkerer Fort Mill, SC -------- Joined: Oct 30, 2021 Posts: 841 Likes: 577 |
Nov 4, 2021 - #7
|
|
stealer0517 New Tinkerer -------- Joined: Oct 28, 2021 Posts: 4 Likes: 2 |
Nov 4, 2021 - #8
It's basically designed to retro fit into some generic fairly large toaster and turn it into the perfect small reflow oven with incredibly temperature accuracy and stability. I want to say this is it, but I thought it was cheaper. Whizoo ElectronicsWhizoo manufactures Controleo3, an intelligent reflow oven controller built upon nearly ten years of feedback from industry experts and hobbyists. It's been used to control hot plates, toaster ovens, and even conveyor belts worldwide.
[Image: whizoo.com]
whizoo.com
I have a few devices that need a reflow, but I don't do that kind of thing too often so I probably won't invest in this kit. But I really should give a toaster oven a shot if I evern try to fix these.
|
|
nottomhanks Tinkerer -------- Joined: Oct 31, 2021 Posts: 148 Likes: 85 |
Nov 4, 2021 - #9
I have a 24" White in my garage that has artifacts. Wonder if there's another card you could swap in there that would be better?
|
|
davidg5678 Tinkerer -------- Joined: Oct 30, 2021 Posts: 60 Likes: 38 |
Nov 4, 2021 - #10
2011 iMac Graphics Card UpgradeiMac 2009 to 2011 MXM3 graphics card upgrade (Lastest update 10/17/2025 - this is the official documentation page - you found it finally!) This is the single and only documentation post. During the last years we constantly updated this post to reflect the lastet development of vBIOS and OCLP...
[Image: forums.macrumors.com]
forums.macrumors.com
I have a 2010 27 iMac which has an AMD WX4150 GPU upgrade installed. This modification has greatly increased the computer's performance, added support for Metal, and thus allowed me to install (normally incompatible) Big Sur, which works very well. It provides roughly the same performance as an AMD RX460. The thread I linked to above has lots of details on the upgrade process. It's a bit complex, but reasonably well documented.
Liked by wottleandCertificate of Excellence |
|
Certificate of Excellence Active Tinkerer United Sates -------- Joined: Nov 1, 2021 Posts: 765 Likes: 530 |
Nov 4, 2021 - #11
I have oven thermometers in both ovens in my kitchen. It makes great sense to use one as an affordable tool to verify internal temperature for reflow tasks imo.
Liked by wottle |
|
nottomhanks Tinkerer -------- Joined: Oct 31, 2021 Posts: 148 Likes: 85 |
Nov 5, 2021 - #12
I have put NVidia K2100m and K4100m GPU with Mac flashed VBios in two 2011 i7 iMacs. It's incredible how much difference it makes with native Metal support and graphics acceleration. Running Patched Mojave as well as Modded Big Sur.
Liked by Certificate of Excellenceanddavidg5678 |
|
JDW Administrator Japan -------- Joined: Sep 2, 2021 Posts: 2,534 Likes: 1,982 |
Nov 13, 2021 - #13
Sorry, I somehow missed seeing this great thread until today!
I actually have 8 videos on the topic of the 2009-2011 iMac video card bake and replacement: My first bake lasted 4 months, but I believe that was due to the fact I did not clean off all the old thermal paste, and the replacement paste I used was old and non-optimal. My 2nd bake lasted 2 years and 9 months, and that was with K4 Pro on the GPU and K5 Pro (a thermal pad replacement paste) on the memory chips. My 3rd & 4th bakes lasted only 1 week each, prompting me to finally swap out the card with a 6970M. I went with that because I don't have any Windoze machines to do flashing of Nvidia cards. I had issues with the 6970M triggering a sudden and unexpected power down (not shutdown) of my iMac until I repasted it and boosted fan speeds a bit higher. Now it runs fine and has since I made my video on that subject. A lot of people ask me about the K2100M and similar cards. My response is always the same -- if you can flash it, go right ahead! But many of those folks want a METAL capable card to run newer versions of MacOS. My personal opinion on that is, you can do it, but I personally don't see the reason why. You see, the CPU is still the same slow-poke he always was. And the newer the MacOS version you try to install, the more taxing it will be on your old motherboard, even with that faster graphics card. In the end, I get quite good compatibility with High Sierra (the last version of MacOS officially supported on the late 2009 27" iMac) and it doesn't require a METAL capable graphics card either. Admittedly, I'm not into gaming, but if I was, a more modern computer would make a lot more sense. And then of course, most people who are into gaming are also into Windoze machines too, not Macs. All said, it's highly unconventional, but when you have nothing to lose, it makes sense and often works for long enough to have made the effort worthwhile. Liked by KingDingus,Gayle,Certificate of Excellenceand 1 other person |
|
Gayle New Tinkerer -------- Joined: Nov 15, 2021 Posts: 2 Likes: 6 |
Nov 20, 2021 - #14
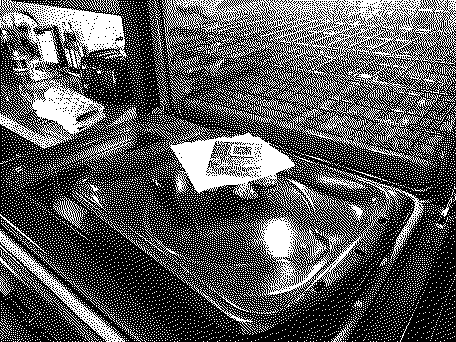
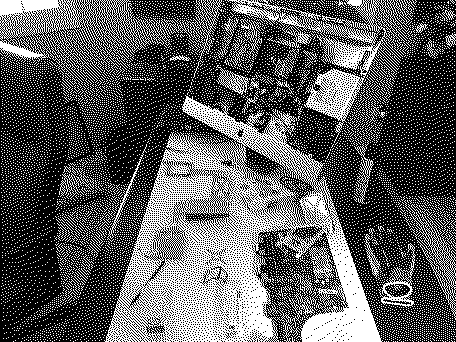
Hi, Everyone - This is my first post on the forum. I've attached two photos and a considerable amount of text describing the resurrection of my late-2009 27-inch iMac, including the graphics card bake inspired by JDW's YouTube videos. It's a comprehensive read, but perhaps someone can learn from my experience.
The Saga of My Late-2009 27-inch iMac It was sometime in the year 2017, and I ran upstairs after getting home from work one day to jump on my late-2009 27-inch iMac for a little Farming Simulator action. To my dismay, my computer wouldn't boot up (white screen with Apple logo for an eternity, and finally, gray horizontal lines). After a few frustrating hours of booting to safe mode, booting to recovery mode, and using every start-up key combination known to man; I gave up and went to bed. After multiple attempts to figure out the issue during the next several years and failing, I resigned myself to using my iMac as a nice piece of digital display art (running in safe mode and rotating through the beautiful nature screensaver photos). I just couldn't bear to throw it away (such a stylish design - even by today's standards). Fast forward to October 2021. I'm sitting at my desk gazing lovingly at my iMac as it shakily transitions from one beautiful nature photo to the next, sometimes freezing and having to be rebooted into safe mode, but mostly just quietly waiting to die. I couldn't take it. There had to be a way to restore my majestic desktop companion to its former glory. So, I headed back to Google again with "white screen of death," "only boots in safe mode," and "help, my late 2009 27-inch iMac doesn't work." And I found JDW's videos. Whoa, what does it mean to "bake" a graphics card? I mean, is it some computer nerd term? Well, I watched all four of JDW's bake videos plus his updates and FAQ - some multiple times. Based on what I learned, my hope was renewed, and I decided to go all out. I called OWC and ordered up a new 1TB SSD with adapter kit plus 32 GB of RAM. I sourced the thermal paste (K-4/K-5 pro), a computer repair tool kit with magnetized Torx screwdrivers (to maintain sanity), a static-free work mat, and a BR2032 PRAM battery from Amazon. Finally, I ordered a new optical drive (the original bit the dust circa 2015) through eBay. Total cost: Approximately $490. Please note that there is no graphics card included in the items I purchased because I was determined to try the bake first. October 31, 2021 - Using JDW's videos to guide me through the disassembly, the cleaning (a zillion swabs continually "black as the night"), the baking (9 minutes at 392 degrees F cooled down on open oven door), and the reassembly; as well as two other videos for the RAM and optical drive replacements (I was saving the SSD upgrade for later); I buttoned up the computer and switched it on...chime sounded, but black screen. Ugh!!! It figures that I would be the only person in the world for whom the bake did not work. It was too late to quit after all the work invested, so...I unscrewed the eight Torx screws and tilted the screen forward to discover...IDIOT!!!...I forgot to plug in the power supply connector to the screen. OK, that was a relief. I plugged in the connector, replaced the screen, pushed the power button, and voila - a lighted screen and chime sound. But wait, it's taking forever to boot. Talk about a roller coaster ride of emotion. So, now I'm back to booting in safe mode, recovery mode and every start-up key combination known to man. In a last-ditch effort, I try to reinstall High Sierra on my hard drive. The system refused the reinstall because the hard drive had a S.M.A.R.T. error (?!?). I guess I shouldn't have saved the SSD upgrade for later. What next? I dove into the machine again. Thankfully, I just needed to pull the glass and unscrew/remove the screen to replace the HDD with the new SSD, which only took about 20 minutes. Done. OK, here we go again. I switched the power button on. After waiting an indeterminable amount of time on the white screen, what should appear but a blinking folder with a question mark. You've got to be kidding!!! Now it's back to Google with "blinking question mark folder" search. Great. According to the search results, my iMac can't find a disk with a bootable OS. Really? Alright, let's try out that new optical drive with my original Mac OS X "Snow Leopard" installation disk (yes, I still have it!). Hard power off. Insert installation disk and power up. Hold down the "C" key. Wait a long time. Blinking folder with question mark. Hard power off and on. Hold down the "Alt/Option" key. Wait a long time. Blinking folder with question mark. Hopes fading fast...need a bootable USB stick or? Regroup. According to OWC instructions, I need to have the old HDD connected to the computer as well as the new SSD when rebooting to install the OS to the new SSD and transfer data. I reason that the old HDD is trashed and won't work for this purpose. But I'm desperate, so I order an external hard drive dock for overnight delivery from Amazon. The Sabrent single bay external drive docking station arrived the next day according to schedule. It was November 10, 2021. I opened the package, connected the docking station to my iMac, and slid my old, trashed HDD into the bay. Another moment of truth coming right up... After 5-plus hours of data transfer with a dying (extremely hot) HDD in the external docking station, I waited anxiously to see if all of the work had been worthwhile. Data transfer rate went down to 7 MBps from an already slow 20 MBps - it even dropped as low as 3 MBps at one point. It seemed like Mac OS High Sierra was successfully installed on the new SSD, but without being able to get past the data transfer stage, I really didn't know what was going to happen. I am happy to report that I now have my majestic, fully functioning and much faster late-2009 27-inch iMac back from the almost dead! A million thanks to JDW for his inspiration and instruction.
Liked by KingDingus,Kai Robinson,RetroViatorand 3 others |
|
JDW Administrator Japan -------- Joined: Sep 2, 2021 Posts: 2,534 Likes: 1,982 |
Nov 20, 2021 - #15
|
| Page 1 of 1 |
| Home | Forums | What's New | Search | Bookmarks | RSS | Original | Settings |
| XenForo Retro Proxy by TinkerDifferent.com |
![[Image: whizoo.com]](/proxy_image?url=http://whizoo.com/cdn/shop/files/Oven_Main.png?v=1694899461)
![[Image: whizoo.com]](/proxy_image?url=https://whizoo.com/cdn/shop/files/favicon.png?crop=center&height=32&v=1694899976&width=32)